The best recovery aid isn’t just a device; it’s the key to an independent, safe daily routine after surgery.
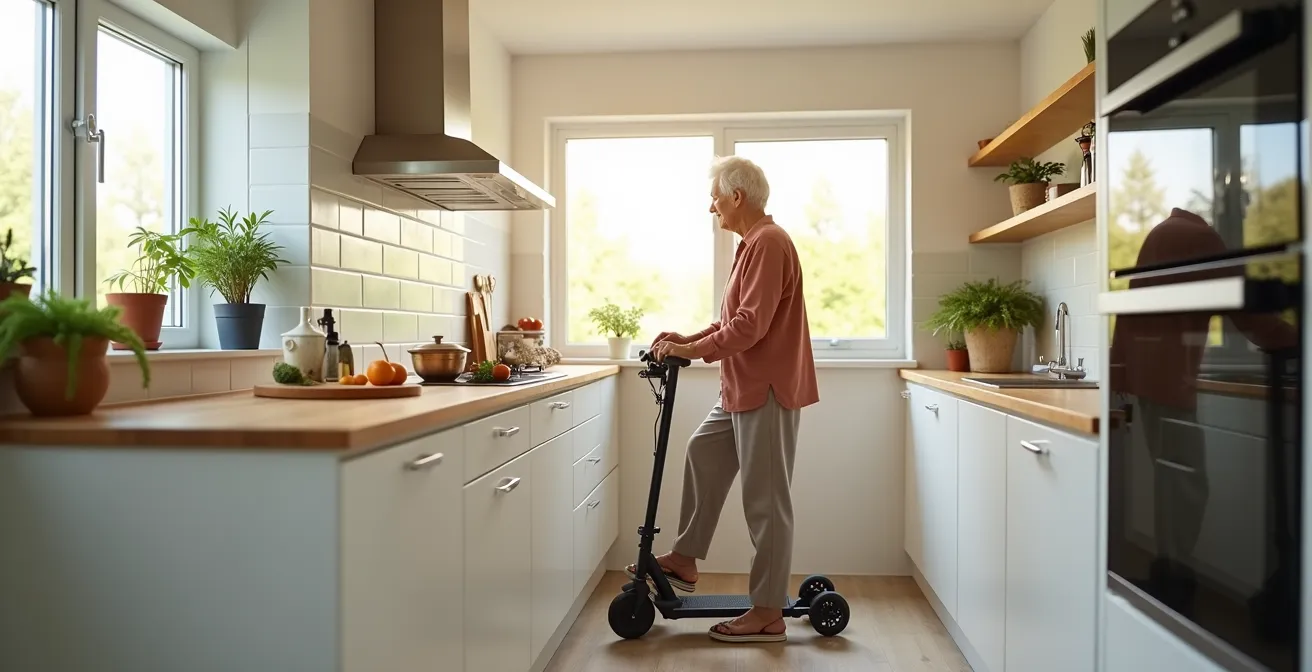
- Knee scooters are often superior for in-home tasks as they free up both hands for activities like cooking and carrying items.
- Improperly using any aid, or limping to compensate, can lead to long-term joint and back problems, negating the benefits of your surgery.
Recommendation: Evaluate your choice based on your home layout and daily ‘energy budget’, creating a complete “Recovery Ecosystem” that includes bathroom and shopping strategies, not just the mobility aid itself.
The first question after foot or ankle surgery is rarely about the procedure itself. It’s the practical, pressing ones that keep you up at night: “How will I get a glass of water?” or “How can I possibly make a simple meal?” For a senior living alone, these aren’t small worries; they are fundamental challenges to your independence. The standard answer often revolves around a simple choice: crutches or a knee scooter. But this debate misses the point entirely.
The common advice focuses on generic pros and cons—crutches are good for stairs, scooters are faster on flat surfaces. This is true, but unhelpful. Your recovery isn’t a race or an obstacle course. It’s about preserving your energy, preventing a fall that could cause a more severe injury, and avoiding new, long-term problems from compensating for your injury. The real goal is to build a temporary but effective Recovery Ecosystem within your home, where every tool works together to keep you safe and self-sufficient.
Thinking this way changes the question from “Which device is better?” to “Which system will allow me to live my life?” This isn’t just about getting from the bedroom to the kitchen. It’s about what you do when you get there. As knee scooters allow you to free up both hands, they become an integral part of tasks like cooking, not just a means of transport. This article will guide you, from a pragmatic nursing perspective, through building that system—from showering safely and shopping strategically to understanding the hidden dangers of ‘just a little’ pain.
We’ll break down the practical decisions you need to make at each stage of your recovery. This guide provides a clear path to not only heal from your surgery but to do so with confidence, safety, and dignity intact, bridging the gap between temporary rehabilitation and a full return to your life.
Summary: Navigating Your Post-Op Recovery with the Right Support
- Cane to No-Cane: How to Wean Yourself Off Support Without Losing Confidence?
- Short-Term Rehab: When Does It Make Financial Sense to Buy Your Walker?
- Tub Transfer Bench: How to Shower Independently While Non-Weight Bearing?
- Why Limping “Just a Little” Can Cause Permanent Hip Misalignment in 6 Weeks?
- How to Manage a Shopping Trip When You Can Only Walk 50 Feet?
- Built-In Bench or Teak Stool: Which Is More Flexible for Caregiver Assistance?
- The “No Pain, No Gain” Myth: Why Soreness Is a Warning Sign, Not a Badge of Honor?
- Power Chair or Scooter: Which Is Better for Indoor Maneuverability in Small Apartments?
Cane to No-Cane: How to Wean Yourself Off Support Without Losing Confidence?
The ultimate goal of any recovery is to get back on your feet—literally. But the transition away from a mobility aid, like a cane, can be psychologically daunting. The fear of falling is real and justified; statistics show that one in four seniors experience a fall each year, and these events can lead to severe injuries. Rushing this process can shatter your confidence and set your recovery back. The key is not to abandon your support cold turkey, but to systematically rebuild trust in your body’s own stability.
Think of this phase as a structured training program. You wouldn’t run a marathon without training, and you shouldn’t walk unaided without preparing. Start by creating a “safe zone” in your home. This is a room with plenty of sturdy furniture—chairs, tables, countertops—that can serve as ‘touch points’ for stability. Begin with short, 5-minute intervals of walking without your cane within this zone. As you feel more stable, you can gradually increase the duration and expand your route through the house. This methodical approach transforms your home from a field of potential hazards into a controlled training ground, building confidence with every step.
This process is about creating an Independence Bridge—a safe, gradual path from reliance on an aid to self-sufficiency. It’s crucial to listen to your body. If you feel tired or unsteady, use the cane. This isn’t a failure; it’s a smart use of your daily energy budget. Progress is not a straight line. By having a plan, you replace fear with a feeling of control, ensuring that your final steps away from the cane are confident and, most importantly, permanent.
Short-Term Rehab: When Does It Make Financial Sense to Buy Your Walker?
During a short-term rehabilitation, a walker can feel like a temporary guest in your home. This often leads to a practical question: is it better to rent or buy? The answer depends almost entirely on the expected duration of your recovery. For very short-term needs (a few weeks), renting is almost always the most cost-effective solution. However, the financial equation changes quickly as the weeks turn into months.
Many insurance plans, including Medicare, have specific policies for this. For instance, Medicare typically covers 80% of the rental cost for a walker for a period of up to 13 months. After this “capped rental” period, ownership of the device may transfer to you. This structure means that if your recovery is expected to last several months, the cumulative cost of your 20% co-insurance on rental fees could easily exceed the one-time out-of-pocket cost of purchasing the walker outright. Buying also offers the advantage of personalization; you can add baskets, trays, and better grips to make the device a more functional part of your Recovery Ecosystem.
This decision is a balance of foresight and finances. If your doctor projects a recovery period of three months or more, purchasing the walker often becomes the more sensible financial choice. The following table breaks down the core considerations:
This cost analysis helps clarify the financial trade-offs between renting and buying a walker based on insurance coverage and duration of use. As shown in a recent comparative analysis, understanding your plan’s specifics is key.
| Option | Duration | Medicare Coverage | Out-of-Pocket Cost* | Ownership |
|---|---|---|---|---|
| Rental | Up to 13 months | 80% of monthly rental fees for 13 months, ownership transfers after | 20% coinsurance + deductible | After 13 months |
| Purchase | Immediate | 80% of approved amount | 20% of Medicare-approved amount (e.g., $20 on a $100 walker) | Immediate |
| Rent-to-Own | Variable | 80% of rental payments | 20% until ownership | After rental cap reached |
Ultimately, a walker is a tool for independence. Choosing how to acquire it should be a strategic decision that supports both your physical and financial well-being during recovery.
Tub Transfer Bench: How to Shower Independently While Non-Weight Bearing?
For anyone who cannot put weight on their foot, the bathroom transforms into the most hazardous room in the house. The combination of slippery surfaces, a high tub wall, and the need to balance on one leg makes showering a high-risk activity. A tub transfer bench is an essential piece of equipment that eliminates the most dangerous part of this process: stepping over the tub ledge. It acts as a bridge, allowing you to sit securely outside the tub, slide across, and swing your legs over without ever bearing weight or losing balance.
According to the CDC, the bathroom is a primary location for falls among seniors, making this simple modification a crucial safety measure. A transfer bench provides a stable surface that extends from inside the tub to the bathroom floor. You can sit, get situated, and then perform the entire bathing process while safely seated, conserving energy and dramatically reducing fall risk. This isn’t just about safety; it’s about reclaiming a fundamental piece of your daily independence and dignity.
Setting up your bathroom correctly is just as important as the bench itself. By organizing the space into three distinct zones—a “Dry Zone” for dressing, a “Transfer Zone” for the bench, and a “Wet Zone” for toiletries—you create a seamless, safe workflow. This systematic approach minimizes unnecessary movements and ensures everything you need is within arm’s reach.
Your Action Plan: 3-Zone Bathroom Setup for a Safe Transfer
- Dry Zone Setup: Place a non-slip mat on the floor outside the tub. Position a chair or hook nearby with your towel and clean clothes, all accessible from a seated position.
- Transfer Zone Configuration: Install the tub transfer bench, ensuring it is perfectly level. Check that all four legs are secure, with two inside the tub and two out. The bathroom floor is often lower than the tub basin, so adjust the leg heights to prevent any tipping.
- Wet Zone Organization: Place all your toiletries (soap, shampoo, washcloth) on a shower caddy or corner shelf that is easily reachable from your seated position on the bench. A handheld showerhead is highly recommended for control.
- Entry & Exit Process: Back up to the bench and sit on the portion outside the tub. Slowly slide your bottom across the bench toward the center. Once stable, lift your legs one at a time over the tub wall. Reverse the process to exit, staying seated until your feet are securely on the non-slip mat outside.
- Final Safety Check: Before use, press down firmly on both sides of the bench to ensure it is completely stable and does not rock. It must remain balanced even when you are only sitting on one end.
This methodical setup is the core of a safe bathing routine. It turns a source of anxiety into a manageable, independent activity.
Why Limping “Just a Little” Can Cause Permanent Hip Misalignment in 6 Weeks?
After an injury, it’s natural to want to “test” your limits and walk with a slight limp, believing it’s a sign of progress. This is a dangerous misconception. Limping is not a step toward healing; it is your body creating an unnatural movement pattern to avoid pain. This compensation, however small, sets off a negative chain reaction throughout your body—what we can call a Compensatory Cascade. When you favor one leg, your pelvis tilts. This tilt forces your spine out of alignment and puts unnatural stress on your “good” hip, lower back, and even the opposite knee and shoulder.
This subtle shift in your body mechanics might seem insignificant at first, but over time, it trains your muscles to hold your body in this incorrect posture. Within as little as six weeks, this can lead to chronic pain, muscle imbalances, and even permanent hip misalignment that requires physical therapy to correct long after your initial injury has healed. The very thing you’re doing to feel more mobile can create a new, more persistent problem.

As the image above illustrates, the body is a connected kinetic chain. A problem in the foot doesn’t stay in the foot. Using a mobility aid correctly—whether it’s crutches, a walker, or a knee scooter—is not a sign of weakness. It’s a crucial tool to maintain proper body mechanics and prevent this cascade. As stated in a Pacific Mobility Center Analysis, “When mobility aids are used properly, they help maintain proper body mechanics and prevent compensatory movements that can lead to secondary injuries.” The goal is to allow your injury to heal completely without creating a new set of problems. Walking aids are essential to reduce the risk of falls and increase mobility, but their most important job is to protect your entire musculoskeletal system during a vulnerable period.
How to Manage a Shopping Trip When You Can Only Walk 50 Feet?
A trip to the grocery store, once a simple chore, can feel like an expedition when your mobility is severely limited. The sheer distance from the car to the checkout line, combined with the need to push a cart and carry items, can quickly deplete your energy budget and put you at risk of a fall. However, with strategic planning, it is entirely possible to manage a shopping trip safely and independently.
The first step happens before you even leave the house. Plan your trip like a military operation. Go during off-peak hours (like a Tuesday morning) to avoid crowds. Use the store’s app or website to create an aisle-by-aisle shopping list to minimize backtracking. Most importantly, call ahead to confirm the availability of motorized shopping carts. These carts are your best ally, allowing you to conserve nearly all your energy for the task of shopping itself, rather than spending it on walking.
For those who are non-weight bearing, a knee scooter can be a game-changer for smaller shopping trips. Its basket can hold your items, and its stability frees your hands. For a larger grocery run, a hybrid approach is often best. Use the store’s motorized cart for the main part of your shopping, then transition to your own walker or scooter for navigating the potentially crowded checkout line and the walk back to your car. Finally, don’t be afraid to use modern conveniences. Curbside pickup is an excellent option for heavy, bulky items, saving your in-store energy for selecting fresh produce or other specific necessities. This combination of pre-planning, equipment, and new services forms a complete system for a successful outing.
Built-In Bench or Teak Stool: Which Is More Flexible for Caregiver Assistance?
When considering bathing aids, the choice between a permanent, built-in shower bench and a portable teak stool often comes down to a question of aesthetics versus flexibility. A built-in bench offers a seamless, non-medical look and maximum stability. However, its fixed position can present a significant challenge if you require assistance from a caregiver. The caregiver is forced to work around the bench, limiting their angles for reaching and assisting, which can increase strain for both of you.
A high-quality portable stool, on the other hand, offers unparalleled flexibility. It can be positioned anywhere in the shower to provide the best possible access for a caregiver. This allows them to assist you from the front, side, or back, ensuring a safer and more comfortable experience. While it may look more “medical,” its practicality is a major advantage. Modern stools are designed with safety as a priority, featuring non-slip rubber tips and textured seats to prevent sliding on wet surfaces. Furthermore, its portability is a benefit in smaller bathrooms where space is at a premium; it can be easily moved or stored when not in use.
The decision ultimately hinges on your current and potential future needs. A built-in bench is a permanent modification, whereas a portable stool can be adapted, moved, or removed as your needs change. This adaptability is often the deciding factor, especially when caregiver support is part of the equation.
This table summarizes the core differences between a built-in bench and a portable stool, drawing on insights from an analysis of home bathing solutions to help guide your choice.
| Feature | Built-In Bench | Teak/Portable Stool |
|---|---|---|
| Caregiver Flexibility | Fixed position limits caregiver angles but provides stability | Can be repositioned for optimal caregiver access |
| User Psychology | Feels permanent and less ‘medical’ | May feel temporary or clinical |
| Space Efficiency | No storage needed but permanent space use | Great for smaller bathrooms, easy to move and store |
| Safety Features | Maximum stability, no risk of sliding | Requires non-slip rubber tips, textured seat, and suction cups for wet surfaces |
| Future Flexibility | Permanent modification, difficult to remove | Can be repurposed or removed as needs change |
The “No Pain, No Gain” Myth: Why Soreness Is a Warning Sign, Not a Badge of Honor?
In the world of fitness, the “no pain, no gain” mantra is common. But in the context of post-surgical rehabilitation, it is a dangerous and counterproductive myth. During recovery, pain is not a sign that you’re getting stronger; it is a critical warning signal from your body that you are pushing too hard, risking re-injury, or causing inflammation that will slow down your healing. Distinguishing between gentle muscle fatigue from a productive physical therapy session and harmful pain is one of the most important skills you can learn.
Therapeutic discomfort, such as mild soreness in muscles that have been inactive, is normal and usually fades within 24 hours. Harmful pain is different. It can be sharp, burning, or persistent, and it often indicates that you’ve stressed the injury site or created a new problem through compensatory movements. Ignoring this signal in the name of “toughing it out” is a recipe for a setback. A mobility aid’s purpose is to *reduce* pain and allow for safe movement, not to enable you to push through it.
The distinction between therapeutic discomfort and harmful pain is critical – proper use of mobility aids should reduce pain, not increase it.
– Physical Therapy Guidelines, Medicare Resources Guide 2024
To help you interpret what your body is telling you, use a simple 1-to-10 pain scale. This objective tool can help you and your healthcare provider make informed decisions about your activity level. Anything above a 4 is a signal to stop and re-evaluate. Learning to listen to and respect these signals is not a weakness; it is the smartest and fastest path to a full recovery.
Key Takeaways
- Your choice of mobility aid should be based on how it integrates into your daily life, not just its features.
- Preventing long-term issues from poor posture or limping is more important than pushing through pain.
- A successful recovery relies on a complete “system” of tools and strategies for tasks like bathing and shopping, not just a single device.
Power Chair or Scooter: Which Is Better for Indoor Maneuverability in Small Apartments?
Sometimes, what starts as a temporary need for a mobility aid evolves into a long-term requirement. When this happens, the conversation shifts from walkers and crutches to powered devices like mobility scooters and power chairs. For seniors living in small apartments, the primary consideration becomes indoor maneuverability. While both devices enhance independence, they function very differently within the tight confines of a home.
Mobility scooters, especially three-wheel models, are designed for good maneuverability. However, they have a larger turning radius than a power chair, which can make navigating narrow hallways, tight corners in the kitchen, or small bathrooms difficult. Furthermore, a scooter functions like a vehicle; you must ‘park’ it and transfer to a dining chair, a sofa, or the toilet. This act of transferring can be tiring and introduce a risk of falls.
A power chair, by contrast, is designed to be an extension of your body. Most models have a zero-turn radius, allowing them to pivot in place, making them exceptionally nimble in small spaces. Crucially, a power chair can be driven directly up to a table or desk, allowing you to participate in activities without transferring. This seamless integration into the home environment conserves a significant amount of energy and provides a greater degree of functional independence. As technology advances, many modern aids now also incorporate smart features like GPS tracking and fall detection to alert caregivers, further enhancing safety.
The following comparison breaks down the key differences for indoor use, drawing from an analysis of home medical equipment.
| Feature | Power Chair | Mobility Scooter |
|---|---|---|
| Turning Radius | Zero-turn capability ideal for tight spaces | Three-wheel models provide maneuverability in tight spaces |
| Transfer Requirements | Can remain seated for most activities | Requires transfers to dining chairs, toilets |
| Table Access | Pulls directly to table like regular chair | Must ‘park’ and transfer, creating separation |
| Indoor Storage | Smaller footprint when not in use | Travel scooters disassemble for transport |
| Weight Capacity | Standard models 300-400 lbs | Heavy-duty models accommodate larger users |
For maximum indoor independence in a compact living space, a power chair is almost always the superior choice due to its tight maneuverability and ability to integrate directly with your home environment.
Your recovery journey is a marathon, not a sprint. By building a thoughtful Recovery Ecosystem—choosing the right tools, modifying your environment, and listening to your body—you are not just healing an injury. You are actively preserving your long-term health, energy, and, most importantly, your independence. The next logical step is to walk through your own home with this new perspective and identify one small change you can make today to create a safer environment for tomorrow.