
The greatest barrier to starting exercise after 65 isn’t age; it’s the fear of pain, which can be overcome by learning to understand your body’s unique signals.
- Gentle, supportive exercises like aqua aerobics can build initial confidence by removing joint impact.
- It’s crucial to learn the difference between productive muscle soreness (a sign of progress) and joint pain (a warning to stop).
Recommendation: Start by identifying one “pain-free” movement from this guide and practice it for just five minutes, three times this week, to begin recalibrating your body’s feedback system.
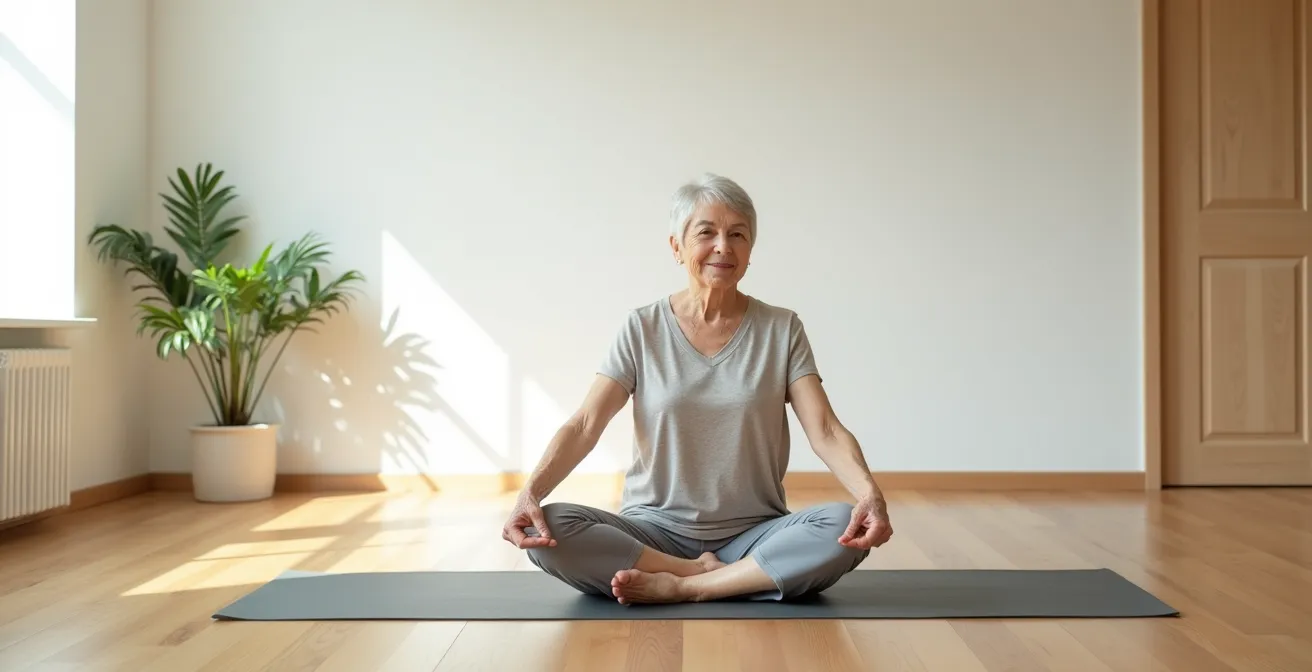
The thought of starting an exercise routine after years, or even decades, of inactivity can feel daunting. Your body feels stiffer, joints may ache, and the fear of a fall or injury looms large. You see others walking or joining classes, but you worry it’s too late or too risky for you. Mainstream advice to “just start slow” feels vague and unhelpful when you don’t know what “slow” truly means for your body, and the “no pain, no gain” mantra of your youth now sounds like a direct threat.
This fear is a powerful barrier, creating a cycle where inactivity leads to more stiffness, which in turn deepens the fear of movement. But what if the key wasn’t just to find “safe” exercises, but to fundamentally change your relationship with physical activity? What if you could learn to decode your body’s signals, distinguishing clearly between the productive discomfort of muscles getting stronger and the sharp warning of joint pain? This is the core of a truly safe and sustainable start.
This guide is built on a principle of welcoming, gradual progress. It’s not about pushing through pain; it’s about moving with intelligence and confidence. We will explore how to choose the right tools and environments that support your body, how to turn everyday activities into beneficial workouts, and most importantly, how to become an expert in your own body’s feedback system. By the end, you will have a clear, safe, and empowering roadmap to reclaim mobility and turn movement from a source of anxiety into a source of daily joy and confidence.
This article breaks down the journey into manageable steps. We’ll explore everything from the gentlest starting points to building real-world strength and confidence for everyday life.
Summary: A Practical Path to Renewed Movement After 65
- Why Aqua Aerobics Relieves Joint Pain Better Than Walking for Arthritis?
- Resistance Bands vs. Dumbbells: Which Is Safer for Weak Wrists and Grips?
- How to Turn a Casual Stroll into a Cardio Workout Without Running?
- The “No Pain, No Gain” Myth: Why Soreness Is a Warning Sign, Not a Badge of Honor?
- Morning Stiffness vs. Afternoon Fatigue: When Is Your Body Ready to Move?
- The Sedentary Trap: How 4 Hours of TV Daily Accelerates Cognitive Decline by 20%
- Why Walking Too Slowly at Crosswalks Is a Sign of Frailty You Can Reverse?
- Why Tai Chi Is Statistically the Most Effective Exercise for Fall Prevention?
Why Aqua Aerobics Relieves Joint Pain Better Than Walking for Arthritis?
For a body unaccustomed to movement, especially one managing arthritis, gravity can feel like an enemy. Every step on hard pavement can send a jolt through the knees, hips, and back. This is where starting your fitness journey in water can feel like a revelation. Aqua aerobics offers a uniquely supportive environment that land-based exercises like walking simply cannot match, primarily due to two key principles of physics: buoyancy and hydrostatic pressure.
Buoyancy is the upward force of the water that counteracts gravity. When you’re submerged up to your chest, your body bears only about 10-20% of its actual weight. This dramatically reduces the compressive load on your joints, allowing you to move with a freedom and range of motion that might be painful on land. It’s an opportunity to strengthen the muscles around your joints without aggravating them.
The second, often overlooked, benefit is hydrostatic pressure. This is the constant, gentle pressure the water exerts on your submerged body. It acts like a full-body compression sock, which can help reduce swelling in the joints and improve circulation. This gentle squeezing can also enhance your awareness of your body’s position, improving proprioception and balance in a safe setting.

As the image above illustrates, the water doesn’t just support you; it provides resistance. Every movement you make—walking, lifting your knees, or swinging your arms—is met with gentle, consistent resistance from all directions. Unlike lifting a weight, which provides resistance in only one direction, water challenges your muscles through the entire movement, building balanced strength without any sudden, jarring impacts.
Resistance Bands vs. Dumbbells: Which Is Safer for Weak Wrists and Grips?
As you build confidence, incorporating strength training becomes the next logical step. Building muscle is essential for supporting your joints, improving metabolism, and maintaining independence. However, for many seniors, weak wrists or arthritic hands make gripping heavy dumbbells painful or impossible. This is where resistance bands emerge as a superior and safer alternative for starting out.
The primary advantage of bands is their variable resistance. Unlike a dumbbell, which has a constant weight throughout a lift, a resistance band’s tension increases as you stretch it. This means the resistance is lowest at the beginning of the movement, when your joint is potentially in its most vulnerable position, and gradually increases as you move through your strongest range of motion. This progressive challenge is inherently safer and more adaptable to your current strength level.
Furthermore, bands remove the stressful, compressive force of gravity that a dumbbell exerts on your hand and wrist joints. As Dr. Andonian explains in a Livestrong article, resistance bands may put less stress through the small joints of fingers compared to heavy weights because they limit these extra gravitational forces. This makes them an ideal tool for strengthening the arms, back, and legs without needing a powerful grip. You can even perform many exercises without holding the bands at all, by looping them around your arms, back, or ankles.
To start safely, focus on exercises that don’t require a tight grip. Here are a few techniques:
- Forearm Loops: For exercises like rows, loop the band around your forearms instead of holding it in your hands.
- Foot Anchors: For bicep curls or shoulder presses, stand on the middle of the band and hold the ends.
- Body Wrapping: For push-ups or chest presses, you can wrap the band around your upper back and loop the ends around your hands or wrists.
How to Turn a Casual Stroll into a Cardio Workout Without Running?
Walking is often hailed as the perfect senior exercise—it’s accessible, free, and low-impact. Yet, a leisurely, unchanging stroll may not be enough to significantly challenge your cardiovascular system. The goal is to elevate your heart rate into a “moderate-intensity” zone, which strengthens your heart and lungs. The good news is you don’t need to start running or even speed walking to achieve this. You can transform a casual walk into a genuine cardio workout by incorporating simple intervals and functional movements.
The core principle is to vary your intensity. Instead of maintaining one slow pace, think in terms of “work” and “recovery” periods. This could be as simple as walking briskly between two landmarks, like from one lamppost to the next, and then returning to a comfortable pace until you’ve caught your breath. This interval approach is far more effective at improving cardiovascular fitness than a steady-state walk.
You can also layer in “movement snacks” to engage more muscle groups. These are short bursts of simple exercises using your environment. For example, every time you reach a park bench, perform five sit-to-stands. When you stop at a curb, do ten calf raises. These small additions break up the walk and add a strength component, turning your stroll into a full-body workout. Even exaggerating your arm swings can increase your heart rate and engage your upper body and core. The aim is to meet the widely accepted goal for senior health; the CDC recommends at least 150 minutes per week of moderate-intensity activity, and these techniques help you reach that target effectively.
Here is a simple progression to get started:
- Landmark Intervals: Start by picking a point ahead (a tree, a mailbox) and walking to it at a brisk pace. Then, walk slowly to the next landmark to recover.
- High-Knee Marching: Every few minutes, march in place for 10-15 seconds, focusing on lifting your knees high to engage your core.
- Incline Power: If your route has a gentle hill, use it. Walk up at a strong pace and recover on the way down.
- Functional Rucking: Once you feel stronger, carry a light backpack with a water bottle or a book inside. This small amount of added weight can increase calorie burn without impacting your joints.
The “No Pain, No Gain” Myth: Why Soreness Is a Warning Sign, Not a Badge of Honor?
One of the most dangerous myths for anyone starting to exercise after a long break is the “no pain, no gain” philosophy. This idea, which suggests that exercise isn’t effective unless it hurts, is not only false but can lead to injury and derail your progress entirely. The most crucial skill you can develop is learning to interpret your body’s feedback system. You must be able to distinguish between the “good” ache of muscle soreness and the “bad” pain of a joint or tissue in distress.
Productive discomfort is known as Delayed Onset Muscle Soreness (DOMS). This is a general, dull ache in the belly of the muscles you worked. It typically appears 24 to 48 hours *after* exercise and feels tender to the touch. It’s a sign that your muscles have been challenged and are now repairing themselves to become stronger. This type of soreness often feels better with gentle movement and stretching.
Warning sign pain, on the other hand, is different. It is often sharp, stabbing, or burning. It is typically localized to a specific joint (not a wide muscle area) and may occur *during* the exercise itself or immediately after. This is not a sign of progress; it is your body’s alarm bell, telling you to stop what you are doing. Pushing through this type of pain is how injuries happen.
The following table provides a clear guide to help you differentiate between these two crucial signals. Learning to use it is fundamental to your long-term success and safety.
| Characteristic | Muscle Soreness (DOMS) | Joint Pain (Warning Sign) |
|---|---|---|
| Location | Muscle belly, diffuse area | Specific joint, localized |
| Timing | 24-48 hours after exercise | During or immediately after |
| Quality | Dull, general ache | Sharp, stabbing, or burning |
| Response to Movement | Improves with gentle activity | Worsens with movement |
| Duration | 2-3 days typically | Persists beyond 3 days |
| Action Required | Continue with light activity | Rest and consult doctor |
Morning Stiffness vs. Afternoon Fatigue: When Is Your Body Ready to Move?
Just as important as *what* you do is *when* you do it. For many seniors, especially those with arthritis, the body’s readiness for exercise can fluctuate dramatically throughout the day. You might wake up feeling like the Tin Man, with stiff, creaky joints, only to feel a dip in energy in the mid-afternoon. Tuning into these personal rhythms is key to creating a sustainable routine that works with your body, not against it.
Morning stiffness is often caused by a phenomenon known as the “gel phenomenon,” where fluid in the joints thickens during periods of inactivity, like sleep. The instinct might be to rest until it goes away, but gentle movement is often the best solution. Before committing to a full workout, try a simple 5-minute mobility test. Gentle cat-cow stretches, slow neck rotations, or seated ankle circles can help “un-gel” the joints. If the stiffness decreases with this light movement, it’s a good sign that your body is ready for more. If the pain increases, it’s wiser to wait until later in the day.
To find your personal peak time, or “Green Zone,” try a simple experiment for one week. Keep a small journal and rate your pain and energy levels on a scale of 1 to 10 when you wake up, at mid-morning, after lunch, and in the late afternoon. You will likely see a pattern emerge. For many, mid-morning is the sweet spot—stiffness has subsided, but the fatigue of the day hasn’t yet set in. This is your optimal window for more demanding activities like strength training or a brisk walk.
It’s also helpful to categorize exercises as either “Energy Givers” or “Energy Takers.” Energy Givers, like a gentle 15-minute walk, Tai Chi, or stretching, can actually help combat fatigue when you’re feeling low. Save the Energy Takers, such as a longer cardio session or a full resistance band workout, for your “Green Zone” when you feel your strongest. This strategic approach ensures you’re always setting yourself up for success.
The Sedentary Trap: How 4 Hours of TV Daily Accelerates Cognitive Decline by 20%
Building an exercise routine is vital, but it’s only part of the equation. The other, equally important part is dismantling the “sedentary trap.” Research increasingly shows that long, uninterrupted periods of sitting can be detrimental to health, even if you meet your weekly exercise goals. Spending hours on the couch watching television, for instance, isn’t just passive; it can actively work against your physical and cognitive well-being. This prolonged inactivity is linked to a higher risk of metabolic issues, muscle atrophy, and even cognitive decline.
The solution isn’t to give up your favorite shows or quiet time. Instead, the strategy is to become an “active couch potato” by peppering these sedentary periods with small, frequent bursts of movement. The key is to break the cycle of stillness. In fact, compelling research shows that breaking up sitting time with just 2-3 minutes of light movement every 30 minutes can significantly counteract the negative effects of being sedentary. Commercial breaks are a perfect, built-in timer for this.
Think of it as creating “movement snacks” throughout your day. These don’t need to be strenuous or long. The goal is simply to stand up, get your blood flowing, and activate your muscles. This simple habit can make a profound difference in maintaining your strength, mobility, and even your brain health over the long term.
Here is a simple plan to turn your TV time into an opportunity for movement:
Your Action Plan: The Active Couch Potato Strategy
- During every commercial break, stand up and perform 10 chair squats, using the couch for balance and support.
- In a longer ad segment, take a short walk to the kitchen and back, focusing on maintaining good posture.
- While watching the show, perform seated leg lifts. Aim for 10 repetitions with each leg during dialogue-heavy scenes.
- Use the nearest wall for support and do 10-15 gentle wall push-ups during the end credits of a show.
- While seated, practice ankle circles and points-and-flexes to keep your lower leg joints mobile and improve circulation.
Why Walking Too Slowly at Crosswalks Is a Sign of Frailty You Can Reverse?
Have you ever felt a surge of anxiety at a crosswalk, worrying you won’t make it to the other side before the light changes? This seemingly small moment is a powerful real-world indicator of a concept called “frailty.” It’s not about age itself, but rather a decline in power, speed, and balance. In fact, walking speed is considered a vital sign in geriatric medicine. According to Harvard Medical School, gait velocity is used by doctors as a key predictor of overall health, fall risk, and longevity in older adults. The good news is that this is not a one-way street; frailty is reversible, and you can build the power and speed needed to navigate your world with confidence.
The ability to walk quickly for a short burst requires more than just endurance; it demands leg power and reactive strength. Power is the ability to generate force quickly—to push off the ground with purpose. Reactive strength is your body’s ability to absorb and redirect force efficiently, which is crucial for maintaining balance when you change pace or navigate an uneven surface.
You don’t need a gym to build these qualities. You can practice simple drills at home that directly translate to crosswalk confidence. The goal is to train your muscles and nervous system to respond quickly. Exercises like rapid sit-to-stands or high-knee marching teach your legs to activate on command. Stepping over small obstacles helps improve your agility and foot clearance, reducing the risk of tripping. These aren’t just exercises; they are rehearsals for real life.
Here is a checklist to audit and improve your ability to walk with power and confidence.
Checklist: Power & Speed Drills for Crosswalk Confidence
- High-Knee Marching: Stand in place and march for 20 steps, focusing on lifting your knees to at least hip height to activate hip flexors.
- Exaggerated Arm Swings: While walking, practice swinging your arms with more force for 30 seconds. This builds momentum and propulsive force.
- Quick Sit-to-Stands: From a sturdy chair, perform 5-8 repetitions of standing up as quickly as you safely can, then sitting down slowly. This builds reactive leg strength.
- Obstacle Step-Overs: Place a rolled-up towel on the floor. Practice stepping over it, lifting your foot high, 10 times with each leg.
- Timed Walking Intervals: In a safe space like a hallway, walk at your normal pace for 30 seconds, then walk as briskly as you safely can for 10 seconds. Repeat this 5 times.
Key Takeaways
- Starting with water-based exercise can dramatically reduce joint pain and build initial confidence.
- Learning to distinguish between muscle soreness (DOMS) and joint pain is the single most important safety skill.
- Breaking up long periods of sitting with 2-3 minutes of movement every half hour is as important as formal exercise.
Why Tai Chi Is Statistically the Most Effective Exercise for Fall Prevention?
As we reclaim mobility, one of the most critical goals is to improve balance and prevent falls, a leading cause of injury in older adults. While many forms of exercise can help, one stands out in scientific literature as uniquely effective: Tai Chi. This ancient Chinese practice, often described as “meditation in motion,” combines slow, deliberate movements, deep breathing, and a focused mind. Its power lies in its multi-faceted approach to the very systems that keep us upright.
Tai Chi directly trains the three pillars of balance: vision, the inner ear (vestibular system), and proprioception (the body’s sense of its position in space). The slow, controlled weight shifts from one leg to another constantly challenge your body’s ability to maintain its center of gravity. The focus on posture and alignment strengthens the core and leg muscles that are essential for stability. Unlike static exercises, Tai Chi is dynamic; it teaches your body to remain stable while in motion, which is precisely when most falls occur.
The mental component is just as important. The practice requires deep concentration, creating a stronger mind-body connection. This heightened awareness helps you to better sense and correct subtle shifts in balance before they become a problem. It’s not just about physical strength; it’s about training your brain to be a better pilot for your body.
The evidence supporting Tai Chi’s effectiveness is robust, making it a cornerstone of many senior wellness programs.
Case Study: Tai Chi Frequency and Fall Prevention Effectiveness
A comprehensive analysis of 24 randomized controlled trials provided clear evidence on how to best utilize Tai Chi for fall prevention. The research revealed that programs practicing 2-3 times per week showed significantly more benefits in reducing falls compared to once-weekly practice. Furthermore, the most effective programs ran for at least 12 weeks, with individual sessions lasting between 50-60 minutes. This demonstrates that both consistency and duration are key to achieving optimal results in balance improvement for adults over 65.
Starting this journey is an act of profound self-care. The next step is to choose one small, manageable action from this guide and commit to it. Whether it’s trying a few chair squats during the next commercial break or finding a local Tai Chi class, the most important thing is to begin. Evaluate the solution that feels most welcoming and achievable for you right now, and take that first confident step.