Designing a “forever home” isn’t about adding accessibility features; it’s about subtracting future barriers from its architectural DNA.
- True accessibility is invisible, integrated into the structure through elements like flush floors and reinforced walls, not added on later as a clinical afterthought.
- Planning must extend beyond physical mobility to “sensory ergonomics,” addressing how lighting and acoustics will affect comfort and communication as you age.
Recommendation: Prioritize structural decisions (floor transitions, wall blocking, flex-rooms) during your current renovation. These are the choices that create timeless value and prevent costly, disruptive remodels in the future.
The dream of a “forever home” is a powerful one, especially when renovating for retirement. It evokes images of a space that will host family gatherings, quiet evenings, and decades of memories. The common approach to “aging in place” often involves a checklist of modifications: widen a doorway here, add a grab bar there. This method, however, treats accessibility as an afterthought, a series of functional patches applied to a design that wasn’t conceived for longevity.
But what if the key to a truly enduring home wasn’t in adding features, but in subtracting future obstacles from its very foundation? This is the core of visionary design. It moves beyond reactive accessibility to proactive, universal design—an architectural philosophy where elegance and function are one and the same. It’s about creating a space that feels open, beautiful, and intentional today, while secretly holding the capacity to adapt to any mobility need tomorrow. It means thinking not just about the path of a wheelchair, but about the quality of light for aging eyes and the clarity of sound for conversations.
This guide isn’t a checklist of compliance codes. It is an architectural brief for your future. We will explore the structural and sensory decisions that transform a standard renovation into a legacy home. We will examine how foundational choices in lighting, flooring, acoustics, and space planning are the true cornerstones of a home that will support you with grace and style for the next twenty years and beyond.
In this article, we delve into the core principles of forward-thinking design. We will navigate through the essential architectural considerations that ensure your home is not just prepared for the future, but is a testament to timeless, intelligent design from day one.
Summary: The Architectural Blueprint for a Timeless, Accessible Home
- Why Ambient Lighting Isn’t Enough: The Importance of Task Lighting in Senior Kitchens
- Thresholds vs. Flush Floors: Why That 1-Inch Strip Is a Major Tripping Hazard?
- CAPS Certified vs. General Contractor: Is the Specialist Credential Worth the Extra Cost?
- Hard Surfaces and Hearing Aids: Why Your Modern Reno Might Make Conversation Impossible?
- Where Will the Aide Sleep? designing a Flex-Room for Future Live-In Help
- When to Start Modifications: The 3 Signs Your Home Is Becoming a Danger Zone
- Loans or Grants: Where to Find Funding for a $10,000 Bathroom Remodel?
- How to Arrange Living Room Furniture to Ensure a Safe Path for a Walker?
Why Ambient Lighting Isn’t Enough: The Importance of Task Lighting in Senior Kitchens
In architecture, light is a building material. Yet in residential design, it’s often treated as decoration. A beautiful chandelier provides ambient light, creating mood and general illumination. But for a home designed for longevity, this is only the first layer. As we age, our eyes require significantly more light to perform tasks with precision and safety. The kitchen, a hub of activity involving sharp knives, hot surfaces, and fine-print labels, is where the gap between ambient and task lighting becomes a critical safety issue.
Task lighting isn’t just about brightness; it’s about focused, shadowless light directed exactly where it’s needed: on the cutting board, over the stove, inside the pantry. This targeted illumination reduces eye strain and dramatically lowers the risk of accidents. Beyond simple function, modern lighting design embraces sensory ergonomics—curating light to support our body’s natural circadian rhythms. A 2023 scientific consensus revealed that 99.5% of currently manufactured lights only support visual tasks, ignoring the biological impact of light. Implementing a layered lighting scheme with tunable temperatures—cool and energizing for daytime prep, warm and relaxing for evening meals—is a core tenet of future-proofing your home’s wellness.
This is a foundational element of a home’s architectural DNA, not a simple fixture swap. It requires planning for dedicated wiring and strategic placement to create a kitchen that is as safe and functional as it is beautiful.
Your Action Plan: Auditing Your Kitchen’s Light Layers
- Identify Work Zones: Map out all critical task areas in your kitchen. This includes the primary food preparation counter, the sink, the stovetop, and any areas used for reading recipes or medication labels.
- Inventory Existing Light: Assess your current fixtures. Are they providing only general ambient light? Note the absence of dedicated under-cabinet, pendant, or track lighting in your key work zones.
- Assess for Coherence: Compare your current setup to the ideal: a layered system with high-quality task lights (CRI above 90) that render colors accurately. Does your lighting create harsh shadows on your work surfaces?
- Evaluate the Experience: Pay attention to how the space feels. Does working in your kitchen cause eye strain? Does the light feel energizing during the day and calming in the evening, or is it a single, static source?
- Create an Integration Plan: Prioritize your upgrades. Start by installing high-quality LED under-cabinet task lighting in the main prep area. Follow this with adding dimmers to all fixtures to allow for scene control throughout the day.
Thresholds vs. Flush Floors: Why That 1-Inch Strip Is a Major Tripping Hazard?
The most elegant accessibility features are the ones that are invisible. Nowhere is this more true than with flooring. A standard home is a landscape of minor obstacles: the small metal or wood strip between the tiled bathroom and the hardwood hallway, the lip of the sliding door track to the patio. For an able-bodied person, these are non-issues. For someone with a walker, a shuffling gait, or a wheelchair, that seemingly insignificant one-inch threshold becomes a formidable barrier and a significant tripping hazard.
A true forever home is built on the principle of intentional flow, and this begins at the floor. Designing for zero-threshold, flush transitions throughout the home isn’t just an accessibility upgrade; it’s a mark of superior craftsmanship and high-end design. It creates a seamless, expansive feel that makes a space feel larger and more cohesive. It requires meticulous planning during the renovation’s sub-floor stage to ensure different materials like tile, wood, and carpet meet at a perfectly level plane.
This single architectural decision to eliminate all interior thresholds is one of the most impactful choices you can make. It subtracts a future of daily frustrations and potential injuries from the home’s design.
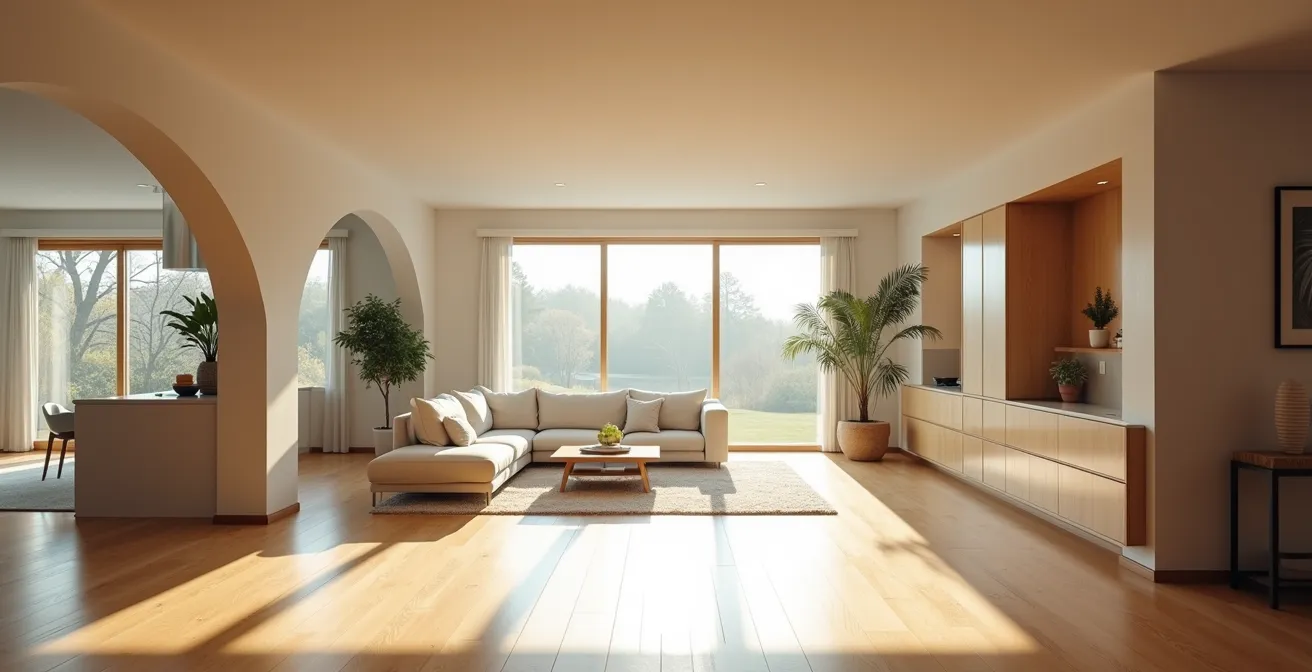
Design Example: The Seamless Aesthetic of HGTV’s Extreme Makeover
In a home renovation for a California teacher featured on HGTV’s Extreme Makeover: Home Edition, the design team eliminated all thresholds to create completely flush transitions. This continuous flow extended from room to room and even to exterior spaces like the patio. The project brilliantly demonstrated how zero-threshold design not only enhances safety for mobility devices but also achieves a luxurious, intentionally designed aesthetic, moving far beyond a clinical or purely functional appearance.

As this image demonstrates, a flush transition is a detail of precision. It is an investment in an uninterrupted path and a commitment to a home that is fundamentally, structurally, safe and navigable for everyone, at every stage of life.
CAPS Certified vs. General Contractor: Is the Specialist Credential Worth the Extra Cost?
Your vision for a beautiful, future-proof home is only as good as the professional executing it. While many general contractors are skilled craftsmen, they often lack the specialized knowledge required for aging-in-place design. Their focus is on the “now”—the immediate aesthetic and function. This can lead to critical oversights that make future adaptations difficult, expensive, or even impossible without significant demolition.
This is where a Certified Aging-in-Place Specialist (CAPS) becomes an invaluable partner. A CAPS professional is trained to think in multiple timelines. They build for today’s desires while embedding invisible adaptability for tomorrow’s needs. This means knowing not just to widen a doorway, but to install a header that can support a pocket door later. It means understanding that the wall behind the beautiful tile in the new bathroom needs to have solid wood blocking installed first, ready to securely anchor grab bars in any position ten years from now.
The National Association of Home Builders, which oversees the CAPS program, offers a stark warning about the difference in mindset. As they note in their guidelines, the risk of not using a specialist is profound:
A CAPS professional plans for future adaptations like reinforced walls for grab bars, while a general contractor may create a ‘beautiful now, impossible later’ home, forcing costly re-demolition
– National Association of Home Builders, CAPS Program Guidelines
The extra cost of a CAPS-certified professional isn’t for the work they do today; it’s an investment to prevent paying twice for the work they enable you to do tomorrow. They are the guardians of your home’s future, ensuring its architectural DNA is truly adaptable.
Hard Surfaces and Hearing Aids: Why Your Modern Reno Might Make Conversation Impossible?
The modern aesthetic—open floor plans, hardwood floors, stone countertops, and large windows—is clean, spacious, and visually stunning. However, these very design choices create an acoustic nightmare. Hard, non-porous surfaces reflect sound waves, causing reverberation and echo that can make understanding conversation incredibly difficult, especially for someone with age-related hearing loss or a hearing aid.
A hearing aid amplifies all sounds, including the background clatter of dishes and the echo of voices bouncing off the walls. In a poorly designed acoustic environment, this can turn a lively family dinner into a cacophony of overwhelming noise. This is where sensory ergonomics extends beyond sight to sound. Designing a forever home requires a plan to manage its acoustics, ensuring it remains a place of clear communication and connection. Fortunately, solutions can be beautifully integrated into the decor.
This isn’t a niche concern; it’s a widespread need. HGTV, citing ADA statistics, reports that nearly 26% of Americans live with a disability, with sensory and mobility accommodations being the most common requirements. Addressing acoustics proactively involves layering soft materials to absorb sound:
- Upholstered Furniture: Sofas and chairs with fabric coverings are natural sound dampeners.
- Heavy Curtains and Draperies: These do double duty, adding style while absorbing sound reflections from windows.
- Thick Area Rugs: Placed in conversation areas like the living room and dining room, they dramatically reduce echo from hard floors.
- Acoustic Art Panels: Modern acoustic panels can be printed with artwork, serving as a focal point while quietly taming reverberation.
- Cork Flooring: As a flooring choice, cork offers a beautiful, sustainable compromise between the rollability needed for a walker or wheelchair and the acoustic absorption of a softer surface.
Balancing hard surfaces for mobility with soft surfaces for conversation is a key part of creating a home that doesn’t just look good, but feels good to live and communicate in.
Where Will the Aide Sleep? designing a Flex-Room for Future Live-In Help
This is the question that most homeowners are reluctant to ask, but which the most forward-thinking architects always consider. Planning for twenty years of life in a home means acknowledging the possibility of needing future live-in assistance. Designing a space for a caregiver from day one doesn’t mean building a sterile “nurse’s room.” It means creating a flexible, multi-purpose space that serves a valuable function now, while containing the architectural DNA for an effortless conversion later.
This “flex-room” could be a ground-floor home office, a den, or a guest bedroom. The key is what’s hidden within its walls. During the renovation, this room should be planned with:
- An Adjacent Bathroom: Design the adjoining bathroom with the dimensions for a future roll-in shower, even if you install a standard tub-shower for now.
- Plumbing and Electrical Rough-ins: Cap off plumbing lines for a future kitchenette or small sink within a wall. Place electrical outlets at heights suitable for both a desk and a hospital-style bed.
- A Separate Entrance: If possible, design the room with a private or semi-private entrance to give both the homeowner and a future aide a sense of autonomy.
- Acoustic Insulation: Enhance the privacy of the space with sound-dampening insulation in the walls.

This approach embodies the principle of future-proofing vs. present-compromise. You get a fully functional, beautiful office or guest room today, without sacrificing a single inch of style. Yet, you have the peace of mind that comes from knowing your home is ready to adapt to provide the highest level of care, should the need ever arise.
Case Study: Julie Sawchuk’s Proactive Flex-Suite
In her own accessible home design, advocate Julie Sawchuk included a flexible space that perfectly illustrates this concept. Initially used as a home office, the room was built with pre-installed plumbing and electrical rough-ins, a separate entrance, and an adjacent bathroom dimensioned for a future roll-in shower. This visionary approach allowed the space to provide immediate value as an office while being fully prepared for a cost-effective conversion into a caregiver’s suite, avoiding the need for a major, disruptive renovation down the line.
When to Start Modifications: The 3 Signs Your Home Is Becoming a Danger Zone
The ideal time to make structural modifications is before they are urgently needed. Waiting for a fall or a medical crisis forces reactive, rushed decisions that often compromise on design and cost more. Proactive planning allows you to integrate changes seamlessly into your lifestyle and budget. But how do you know when to act? There are several “opportunity windows” and subtle signs that your current home is beginning to work against you.
The first sign is the “one-step-down” rule: you start unconsciously avoiding certain tasks because they’ve become inconvenient. Maybe you stop using a high cabinet, or you find yourself carrying smaller loads of laundry up the stairs. These are micro-adjustments that signal a growing friction between you and your environment. The second is the life milestone window. Events like a planned kitchen remodel, children leaving for college, or even refinancing your home are perfect moments to bundle in accessibility modifications. The disruption and expense are already happening, making it the most efficient time to widen a doorway or reinforce a wall. According to aging-in-place adaptation studies, the cost of widening a single doorway can range from $700 to $2,500—an expense far easier to absorb during a larger project.
Finally, the most important window is your health status. The best time to manage a construction project is while you are still physically and mentally capable of overseeing the process. Use these windows of opportunity to apply a triage method:
- Do Structural Work Now: Focus on things that require opening walls, like widening doorways, installing in-wall blocking for future grab bars, and creating flush floor transitions.
- Plan for Fixtures Later: You don’t need to install grab bars or a roll-in shower today. But by doing the structural prep work now, you make their future installation a simple, one-day job for a handyman rather than a full-scale demolition.
Acting within these windows transforms home modification from a stressful emergency response into a strategic, empowering act of future-proofing.
Loans or Grants: Where to Find Funding for a $10,000 Bathroom Remodel?
A visionary renovation, even one focused on a single room like a bathroom, represents a significant financial investment. A budget of $10,000 or more is common for a project that includes a curbless shower, reinforced walls, and improved lighting. Fortunately, a variety of funding sources exist specifically to help homeowners finance these medically necessary and safety-oriented modifications.
The key is to explore these options proactively, as many have specific eligibility requirements related to age, income, location, or veteran status. For those planning ahead, a Home Equity Line of Credit (HELOC) is often the most flexible option, allowing you to leverage your home’s value. However, for those who qualify, specialized grants can provide substantial funding that doesn’t need to be repaid. It is also worth exploring less obvious avenues. As the University of Southern California’s Home Modification Network points out, discussing modifications with long-term care insurance providers or leveraging a Health Savings Account (HSA) can sometimes be viable options, especially if the changes can be framed as preventative care with a doctor’s letter of medical necessity.
The following table, based on an analysis of common funding sources, outlines some of the primary avenues available to homeowners.
| Funding Type | Amount Available | Eligibility | Best For |
|---|---|---|---|
| USDA Rural Housing Repair | Loans up to $70,000 Grants up to $7,500 |
Age 62+, low-income, rural areas | Major renovations |
| VA SAH Grant | Up to $117,014 (2024) | Service-connected disabilities | Veterans with disabilities |
| HELOC | Based on home equity | Homeowners with equity | Proactive planners |
| HSA Funds | Account balance | Medical necessity documentation | Medically required modifications |
Researching these options well in advance of breaking ground is a critical step in making your forever home a financial and functional reality.
Key Takeaways
- Design for Subtraction, Not Addition: The most profound accessibility improvements come from removing barriers (like thresholds) from the initial design, not adding features (like ramps) later on.
- Embrace Invisible Adaptability: The smartest renovations include “invisible” preparations like in-wall blocking for future grab bars and plumbing rough-ins for potential caregiver suites.
- Prioritize Sensory Ergonomics: A truly comfortable home considers more than just physical movement. Plan for layered task lighting and manage acoustics to support aging eyes and ears.
How to Arrange Living Room Furniture to Ensure a Safe Path for a Walker?
Even in the most thoughtfully designed open-plan home, the final layer of accessibility comes down to furniture arrangement. A beautiful, spacious living room can become an obstacle course if sofas, chairs, and coffee tables constrict movement. The goal is to preserve the aesthetic and comfort of the room while creating clear, wide pathways that allow for safe passage with a walker or a 360-degree turn in a wheelchair.
The guiding principle is the 5-foot turning circle. According to ADA guidelines, a 5-foot (or 1.5-meter) clear diameter is required for a wheelchair user to pivot completely without needing to make a multi-point turn. You should aim to have at least one such clear zone in the main living area. Beyond this, it’s about making smart, flexible furniture choices that support rather than hinder mobility.
Creating this “intentional flow” doesn’t require a spartan, empty room. It simply requires a more strategic approach to layout and selection:
- Map the Desire Lines: Observe the natural pathways people take through the room—from the hallway to the sofa, from the sofa to the kitchen. Keep these primary routes clear of any obstacles.
- Secure or Remove Rugs: Area rugs can add warmth and define a space, but their edges are a notorious tripping hazard. Ensure any rug is either very low-profile or firmly secured with double-sided tape. In high-traffic paths, it’s often safer to remove them entirely.
- Choose Flexible Furniture: Opt for modular sectionals that can be reconfigured or sturdy ottomans that can serve as both a coffee table and extra seating. C-shaped end tables that can slide over the arm of a sofa or chair are excellent for bringing a surface close without obstructing the floor.
- Pull Furniture from Walls: In an open plan, floating furniture away from the walls actually creates clearer, more defined pathways around the conversation area, rather than forcing traffic through the middle of it.
This final step ensures the home’s grand architectural vision translates into a safe, comfortable, and elegant everyday living experience.
By integrating these architectural principles into your renovation, you are not merely preparing for a potential future with a wheelchair. You are commissioning a more thoughtful, intelligent, and beautiful home for every day between now and then. The next logical step is to begin a conversation with a specialist who can translate this vision into a structural reality. Evaluate your space, identify your priorities, and start building the foundation for your forever home today.