Most home safety advice offers overwhelming checklists, but a truly effective audit is a diagnostic process of observing behavior to identify and fix systemic risks.
- Prioritize high-impact, low-cost changes like lighting, which often prevent more falls than expensive renovations.
- Learn to spot subtle warning signs like “furniture surfing” or task avoidance before a fall occurs.
- Adopt a specialist’s mindset to proactively address hazards in the bathroom, kitchen, and hallways.
Recommendation: Instead of just looking for problems, start by observing how your parents move through their home for one hour. Their patterns will reveal the true priorities for modification.
Visiting your aging parents, you notice something new. A hand that steadies itself on the wall down a familiar hallway. A slight hesitation before stepping over a threshold. These are quiet signals, easy to dismiss. The common response is to search for a generic “fall prevention checklist,” a daunting list of tasks that feels both urgent and impossible, often mixing trivial fixes with major renovations. This approach is flawed because it treats the home as a static collection of hazards rather than a dynamic environment.
The truth is, a meaningful safety audit isn’t about ticking boxes. It’s about learning to see the home through the eyes of an aging-in-place specialist. It’s a methodical process of behavioral observation that reveals how the environment interacts with changing mobility. It’s about understanding the “why” behind a risk—why poor lighting is more dangerous than a cluttered room, or why the way a cabinet opens can create more strain than a heavy pot. Many guides will mention grab bars or non-slip mats, but few teach you the diagnostic skills to prioritize what truly matters.
This guide departs from the generic checklist. It will equip you with a specialist’s framework to conduct a targeted, two-hour audit. You will learn to identify systemic risks and implement high-impact interventions, focusing on the subtle but critical details professionals look for. We will move from room to room, not just looking for problems, but understanding the underlying principles of a safe, independent living space. This is about empowering you to take effective action now, transforming anxiety into a concrete plan for long-term safety and peace of mind.
To guide you through this diagnostic process, we’ve structured this audit around the most critical areas where targeted improvements make the biggest difference. The following sections will walk you through each key observation and action.
Summary: A Methodical Home Safety Audit
- Why Spending $500 on Lighting Prevented More Falls Than a $5,000 Bathroom Remodel?
- How to Anchor Grab Bars into Drywall vs. Tile Without Cracking the Surface?
- Pull-Down Shelves or Drawers: Which Cabinet Solution Reduces Back Strain Best?
- The Invisible Danger of Throw Rugs That Sends 38,000 Seniors to the ER Annually
- When to Start Modifications: The 3 Signs Your Home Is Becoming a Danger Zone
- How to Perform a “Slide Test” to Check Your Bathtub’s Safety Coating?
- Motion Sensor vs. Voice Control: Which Is Better for Midnight Bathroom Trips?
- How to Design an Open Floor Plan That Accommodates a Wheelchair Before You Need One?
Why Spending $500 on Lighting Prevented More Falls Than a $5,000 Bathroom Remodel?
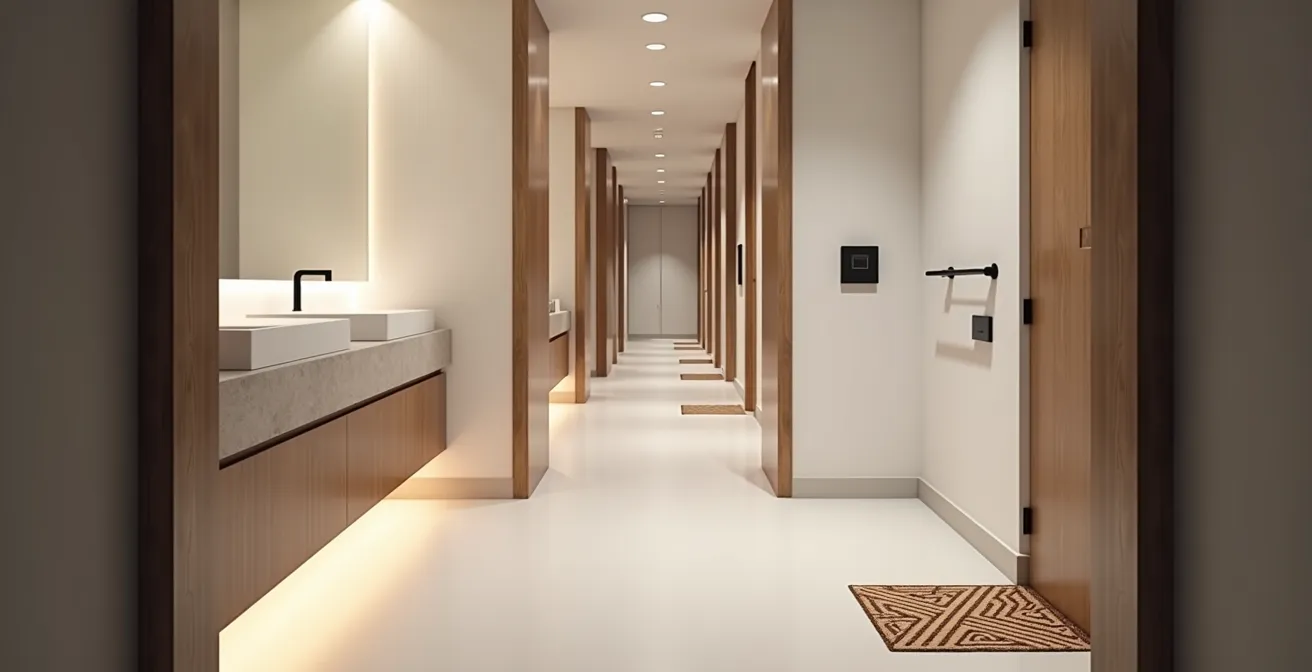
A common instinct is to focus on major renovations, like redoing a bathroom, assuming a big budget equals big safety gains. However, the highest-impact intervention is often the most overlooked: lighting. As we age, our eyes require three to four times more light to see with the same clarity as a younger person. More importantly, poor lighting profoundly affects depth perception and contrast sensitivity, turning a simple step or a rug’s edge into a significant trip hazard. A dark hallway doesn’t just make it hard to see; it makes it hard to judge distance and elevation.
This is a prime example of a systemic risk. A $5,000 bathroom remodel is useless if your parent stumbles in a poorly lit hallway on the way there. Investing a fraction of that cost in a layered lighting strategy yields a far greater return on safety. This includes task lighting in the kitchen (under-cabinet LEDs), ambient lighting in hallways (brighter ceiling fixtures), and accent lighting to define pathways (low-level nightlights). The goal is to eliminate shadows and create even illumination between rooms, so the eyes don’t have to constantly readjust.
Focus your initial audit on light levels. Walk through the house at dusk. Are there dark corners? Are the pathways to the bathroom and kitchen uniformly bright? Upgrading bulbs to brighter, daylight-spectrum LEDs and adding plug-in motion-sensor lights in key transition areas are high-impact, low-effort changes that address the root cause of many balance issues. This is the first and most critical step in your diagnostic process.
How to Anchor Grab Bars into Drywall vs. Tile Without Cracking the Surface?
Grab bars are non-negotiable in a bathroom, but their effectiveness is entirely dependent on their installation. A poorly mounted bar is more dangerous than no bar at all, as it provides a false sense of security. The challenge lies in achieving a secure anchor that can withstand several hundred pounds of sudden force, especially on tricky surfaces like tile or hollow drywall where studs are not available.
For drywall without a stud, standard plastic anchors are insufficient. You need a toggle bolt or a wall anchor system specifically designed for hollow walls, such as the WingIts or Moen SecureMount anchors. These devices brace against the back of the drywall, distributing the load over a much larger surface area to prevent the bar from ripping out. The key is using the correct size anchor and hole, ensuring a snug fit before tightening.

Drilling into tile requires even more precision to prevent cracking a surface that’s difficult and expensive to replace. The process is methodical. As the checklist below outlines, using the right tools and technique is critical. A diamond-tipped bit is essential, as a standard bit will wander, chip the glaze, and likely crack the tile. Slow speed and light pressure prevent overheating, which is the primary cause of fractures. This is not a task to be rushed; it demands a specialist’s patience.
Action plan: Installing a grab bar into tile on a hollow wall
- Apply painter’s tape over the drill location to prevent the drill bit from “walking” and to help minimize surface chipping.
- Use a new, high-quality 1/2-inch diamond-tipped drill bit designed specifically for drilling into hard ceramic and porcelain surfaces.
- Drill at a slow, consistent speed with very light pressure, periodically spraying water on the bit to keep it cool and prevent overheating.
- Insert a heavy-duty toggle bolt anchor system rated to support a minimum of 300 pounds of force.
- Apply a bead of 100% silicone sealant around the hole and on the back of the grab bar’s mounting flange before final tightening to create a waterproof seal.
Pull-Down Shelves or Drawers: Which Cabinet Solution Reduces Back Strain Best?
The kitchen is a workspace, and its ergonomics are critical. Reaching up into high cabinets or bending down to rummage through low ones creates a high risk of back strain and loss of balance. Retrofitting cabinets with accessibility hardware is a proactive modification that directly reduces this daily risk. The two most effective solutions are pull-down shelving systems for upper cabinets and full-extension drawer systems for lower ones, but they solve different problems.
Pull-down shelves bring the contents of high cabinets down to a reachable, chest-level height. This is ideal for individuals with limited back or hip flexibility who find it painful to bend, but who still have good upper body strength to operate the pull-down mechanism. Drawer systems, conversely, replace deep lower cabinets with sliding drawers, bringing the back of the cabinet out into the open. This is superior for those with poor shoulder strength or range of motion, as it eliminates the need to reach up or bend down significantly.
Adopting a professional mindset is key here. In fact, studies show a remarkable 21% to 31% reduction in fall rates when home assessments are performed by an occupational therapist who analyzes these very ergonomic challenges. The following table breaks down the choice, helping you think like a therapist to select the right solution.
| Feature | Pull-Down Shelves | Drawer Systems |
|---|---|---|
| Best For | Limited back flexibility | Poor shoulder strength |
| Required Strength | Upper body needed | Minimal force required |
| Accessibility Zone | Converts high storage | Waist-level access |
| Installation Cost | $200-400 per shelf | $150-300 per drawer |
The Invisible Danger of Throw Rugs That Sends 38,000 Seniors to the ER Annually
Throw rugs are perhaps the most underestimated hazard in a senior’s home. They are a primary contributor to the nearly 3 million fall-related emergency department visits for older adults each year. The danger is twofold: a curled edge creates a trip hazard, and a slippery backing can cause the entire rug to slide out from underfoot. The common advice is to “remove all throw rugs,” but this can feel drastic and make a home feel cold and uninviting. A more nuanced, diagnostic approach is needed.
Instead of a blanket ban, perform a “shuffle test” on every rug in the home. Put on the type of shoes or slippers your parent normally wears. Stand on the rug and try to push it or slide it with your feet without lifting them. Does it bunch up? Does it slide easily? If there is any movement, the rug is a hazard. The solution is not necessarily removal, but proper securing. A high-quality, non-slip rug pad that grips both the floor and the rug is essential. For corners that tend to curl, double-sided carpet tape provides a secure, low-profile fix.

This test is an active form of friction analysis—a core concept in fall prevention. You are testing the coefficient of friction between the rug, the floor, and footwear. A safe rug is one with high friction on both its top and bottom surfaces. Look for low-pile rugs that are less likely to catch a toe and ensure they are placed away from major pivot points like the entrance to a kitchen or bathroom where feet are more likely to shuffle.
When to Start Modifications: The 3 Signs Your Home Is Becoming a Danger Zone
The most difficult question is often “when?” When does a home cross the line from comfortable to dangerous? Waiting for a fall to happen is a reactive and often tragic strategy. A proactive audit involves looking for subtle behavioral clues that signal mobility is changing and the environment is no longer a perfect fit. These signs are clear indicators that it’s time to begin modifications, even if the person insists they are “fine.”
Your audit should focus on observing these three critical warning signs. They are the leading indicators that balance and confidence are decreasing. Ignoring them means ignoring the precursors to a fall. The first sign, “furniture surfing,” is particularly telling, as it shows a person is subconsciously creating their own support system because they no longer feel stable walking in open spaces. Task avoidance is more subtle; it’s about what is *not* being done anymore. If the upstairs bedroom or the good china on a high shelf is suddenly off-limits, it’s a red flag for a mobility-related challenge.
Checklist: The Three Critical Warning Signs
- Furniture Surfing: Observe if your parent uses walls, furniture, or countertops for support while walking through the home, especially in open areas.
- Task Avoidance: Note if they’ve stopped using certain parts of the house (like an upstairs bathroom) or avoid activities they used to do (like reaching for high shelves).
- Near Misses: Ask about or watch for stumbles, trips, or moments of imbalance, even if they don’t result in a full fall. These are rehearsals for a more serious event.
Identifying any of these signs means the time for proactive modification is now. It’s crucial to address this without causing alarm, framing it as a way to maintain independence for longer. Once a fall does occur, the risk of another skyrockets, making intervention an urgent priority.
If you fall once, you raise your risk for falling again. Make sure you inform your Health Care Provider if you fall, or even if you just feel unsteady when you walk.
– Massachusetts Department of Public Health, Fall Prevention Tips and Resources
How to Perform a “Slide Test” to Check Your Bathtub’s Safety Coating?
The bathroom is the highest-risk room in the house, and the wet, slippery surface of a bathtub or shower floor is the primary culprit. Many modern tubs have a textured, non-slip surface from the factory, but this coating wears down over time and with certain cleaning agents. Simply looking at the surface is not enough; you must perform a tactile test to assess its safety.
This “Slide Test” is another form of friction analysis. It’s a simple, effective way to gauge the tub’s coefficient of friction when wet. It’s critical to perform this test safely, with support nearby to prevent a slip during the test itself. The goal is to feel for any slickness or lack of grip. If your hand slides easily, the surface is unsafe. It indicates the original safety coating has worn away and intervention is required immediately.
Once you’ve identified an unsafe surface, you have a tiered set of solutions. The test protocol below outlines these options, from temporary mats to permanent refinishing. While non-slip mats are a quick fix, they can introduce their own risks (mold growth, tripping on the edge) and require frequent cleaning. Adhesive treads offer a more permanent solution, but the ultimate fix is professional refinishing with a new, integrated non-slip texture.
- Test Setup: Sit safely on the edge of the tub or have a sturdy chair nearby for support. Do not stand in the tub to perform the test.
- Wet Surface Test: Run water over the tub floor. With your hand wet, press down firmly on the surface and try to slide your hand across it.
- Pass/Fail Criteria: If your hand moves smoothly with little to no resistance, the surface has failed the test. A safe surface will provide noticeable friction and grip.
- Solution Tiers: If the surface fails, consider these options in order of permanence: Tier 1 – A high-quality, non-slip mat with suction cups ($20-40); Tier 2 – Adhesive non-slip treads ($30-60); Tier 3 – Professional tub refinishing with a new textured surface ($300-500).
Motion Sensor vs. Voice Control: Which Is Better for Midnight Bathroom Trips?
Waking in the middle of the night, disoriented and in the dark, is a peak time for falls. Navigating to the bathroom safely is paramount. Technology offers two excellent automated lighting solutions: motion sensors and voice control. While both are vast improvements over fumbling for a light switch, they serve different needs and have different points of failure.
Motion sensor lighting is the gold standard for reliability and ease of use. It is a passive system: the user does nothing, and the lights simply come on when movement is detected. This is ideal because it requires zero cognitive load. There’s no command to remember, no button to find. The best implementation involves low-wattage, pathway-level lighting (like LED strips under the bed and along baseboards) that illuminates the floor without being jarringly bright, preserving night vision. Its main drawback is potential for false activation (e.g., by a pet) or failure to detect slow movement.
Voice control lighting (via smart speakers) offers more flexibility but introduces complexity. The user must remember a specific wake word and command (“Hey Google, turn on the bathroom light”). This can be difficult when groggy, ill, or in a state of panic. It is also dependent on a stable Wi-Fi connection and the device’s ability to hear correctly. However, it allows for more granular control (e.g., “Set bathroom light to 10%”). For a primary safety system, the passive, thought-free nature of motion sensors is almost always the superior choice for the critical path from bed to bathroom.
Key Takeaways
- An effective home audit is a diagnostic process based on observing behavior, not just a generic checklist.
- Focus on high-impact, low-cost interventions first, especially improving lighting throughout the home.
- Learn to identify the three key warning signs—furniture surfing, task avoidance, and near misses—to act before a fall occurs.
How to Design an Open Floor Plan That Accommodates a Wheelchair Before You Need One?
The final step in a specialist’s audit is to shift from reactive fixes to proactive design. This means thinking about future needs today. While nobody wants to imagine a time when a walker or wheelchair is necessary, planning for it now is the key to ensuring long-term independence at home. Incorporating principles of universal design into any remodeling project is not just a safety measure; it’s a smart investment.
The core of a wheelchair-accessible plan is creating an open flow with adequate clearance. The standard is a minimum of 36-inch wide doorways and hallways. This may seem excessive now, but widening a doorway during a remodel is far cheaper and less disruptive than doing it as an emergency retrofit later. Another key element is creating zero-threshold entryways, not just at the front door but between rooms, especially into bathrooms. Eliminating that small half-inch lip removes a major tripping hazard for everyone and ensures smooth passage for a mobility device.
Thinking about maneuverability is also crucial. A wheelchair requires a 5-foot (60-inch) diameter turning radius. When planning a kitchen or bathroom layout, consider if this space exists. Can you create it by moving an island or choosing a pedestal sink over a large vanity? Far from being clinical or sterile, these features are increasingly seen as desirable upgrades. In fact, a home that incorporates universal design principles like 36-inch doorways and zero-threshold entryways is often perceived as more spacious, functional, and can have a higher resale value.
By shifting your perspective from a simple checklist to a methodical, diagnostic process, you’ve equipped yourself with the tools to make a tangible difference in your parents’ safety and independence. For a personalized assessment and to discuss implementing these modifications, consulting with a Certified Aging-in-Place Specialist (CAPS) is the logical next step.