
The safest rollator isn’t the one with the most wheels, but the one that best matches your specific balance needs and home environment.
- 4-wheel models offer a wider, more stable base of support, which is critical for users with significant balance deficits.
- 3-wheel models provide superior maneuverability, making them ideal for navigating tight indoor spaces but less stable overall.
Recommendation: Prioritize a 4-wheel rollator for its superior stability, especially for outdoor use, but only after confirming its turning radius and width are compatible with your narrowest doorways and hallways.
Choosing a rollator can feel overwhelming. You see options with three wheels, others with four, and the core question remains: which one will truly keep me safe? For a senior managing balance issues, this isn’t a simple shopping decision; it’s a critical choice that directly impacts mobility, confidence, and fall prevention. The common advice pits the maneuverability of 3-wheel models against the stability of 4-wheel models, presenting it as a simple trade-off. However, this view is dangerously incomplete.
The real difference lies in their biomechanical purpose. A rollator isn’t just a frame with wheels; it’s a tool that interacts with your body, alters your center of gravity, and provides a new base of support. The most significant mistake is choosing a model based on one feature (like a tight turning circle) while ignoring how it supports your specific type of imbalance. A rollator that feels nimble in a store can become a hazard at home if its support base is too narrow for your needs.
This guide moves beyond the surface-level “stability versus maneuverability” debate. We will analyze how each design element—from the braking system to the placement of a basket—directly affects your safety. By understanding the underlying principles of support, posture, and environmental fit, you can make an informed decision that truly enhances your independence and minimizes risk, rather than simply picking the one that looks easiest to push.
To help you navigate this important choice, we have structured this guide to cover every critical aspect, from the mechanics of the device to the environment you live in. The following sections will provide clear, safety-focused advice to ensure you select the right partner for your mobility needs.
Summary: 3-Wheel vs. 4-Wheel Rollator: Which Is Safer for a Senior with Balance Issues?
- Push-Down vs. Loop Brakes: Which Is Easier for Arthritic Hands to Engage?
- Indoor vs. Outdoor Models: Why Your “All-Terrain” Rollator Doesn’t Fit in the Bathroom?
- The “Parking Brake” Habit: How to Sit on Your Rollator Without Falling Backward?
- How to Go Up Curbs With a Rollator Without Hurting Your Lower Back?
- Tray or Basket: Which Accessory Helps You Carry Lunch Without Spilling?
- The “2-Foot Rule”: Why Your Hallway Consoles Need to Go Right Now?
- Community Center vs. Specialized Studio: Where to Find Instructors Trained for Seniors?
- Why Your Shoulders Hurt After Using a Standard Cane for Only 20 Minutes?
Push-Down vs. Loop Brakes: Which Is Easier for Arthritic Hands to Engage?
The braking system is your primary safety control on a rollator. For anyone with arthritis, neuropathy, or diminished hand strength, choosing the right type is not a matter of preference but of necessity. The two most common types are loop brakes and push-down brakes, and their mechanisms are fundamentally different. Loop brakes, resembling those on a bicycle, require you to squeeze a lever. This action can be difficult and painful if you have arthritic fingers or a weak grip. While intuitive for many, they demand sustained pressure, which can be fatiguing.
In contrast, push-down brakes operate on a simpler principle: applying downward pressure on the handles engages the brake. This is often an ideal solution for individuals with severe arthritis or conditions that make gripping painful. The action uses body weight rather than hand strength, making it more accessible. The downside is that it can feel less intuitive initially, and you must consciously release the pressure to move again. The choice here is a direct assessment of your hand capability versus cognitive familiarity.
This comparative table breaks down the key differences to help you assess which system is safer for your specific condition.
| Feature | Push-Down Brakes | Loop Brakes |
|---|---|---|
| Ease of Use | Better for weak grip/neuropathy | More intuitive (bicycle-like) |
| Cognitive Load | Simple on/off action | Requires continuous grip |
| Maintenance | Simpler mechanism | Cable tension adjustments needed |
| Best For | Arthritis, stroke, forgetfulness | Good hand strength, familiar users |
Ultimately, the safest brake is the one you can engage reliably and without pain, every single time. If squeezing is a challenge, a push-down system offers a more dependable safety net. If your hand strength is good, the familiarity of loop brakes might be preferable.
Indoor vs. Outdoor Models: Why Your “All-Terrain” Rollator Doesn’t Fit in the Bathroom?
Manufacturers often market rollators with large, 8-inch wheels as “all-terrain,” creating the impression they are a one-size-fits-all solution. While these models are excellent for navigating cracked sidewalks, lawns, and gravel paths, they often fail spectacularly in the one environment you frequent most: your own home. The very features that make a rollator great for the outdoors—a wide, stable base and large wheels—make it clumsy and often unusable indoors.
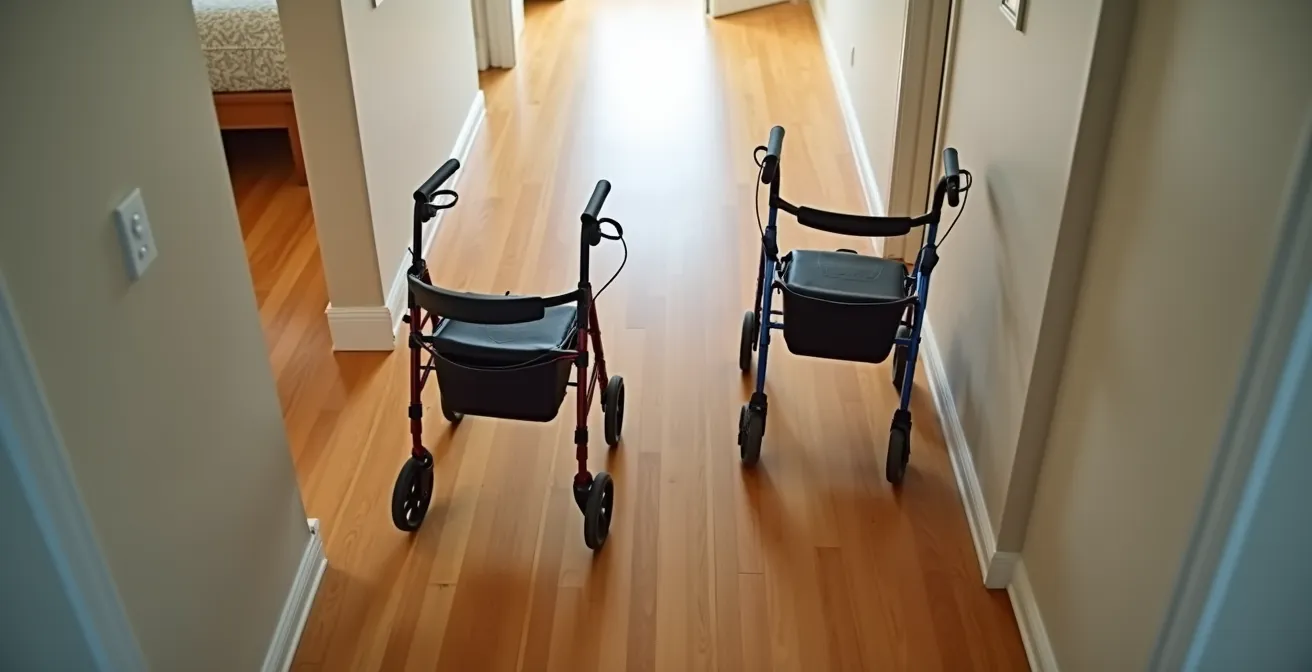
A wider 4-wheel outdoor rollator provides a superior base of support, which is crucial for stability on uneven ground. However, that same width can prevent it from passing through standard interior doorways, especially in older homes or bathrooms where doors are narrower. Furthermore, the turning radius of a 4-wheel model is significantly larger than that of a 3-wheel model. This means that even if you get it through the door, you may not be able to make the tight turns required in a hallway or a small kitchen.
This illustration clearly shows the spatial dilemma. The compact 3-wheel model can navigate the tight corner, while the larger 4-wheel model is effectively blocked, forcing the user into an unsafe situation.
This is why some seniors opt for two devices: a robust 4-wheel rollator for outdoor excursions and a nimble 3-wheel model or a simple walker for indoor use only. Acknowledging that one device may not solve all your problems is a key step toward true safety.
The “Parking Brake” Habit: How to Sit on Your Rollator Without Falling Backward?
For many, the built-in seat on a 4-wheel rollator is a key feature, offering a welcome chance to rest during walks or while waiting in line. However, this convenience comes with a significant, often overlooked, risk. Many serious falls occur not while walking, but during the simple act of sitting down or standing up from the rollator. The device is stable only when it’s stationary, and the only thing ensuring it stays put is the parking brake. Forgetting to engage it is a recipe for disaster.
When you attempt to sit on an un-braked rollator, the device can easily roll backward out from under you, leading to a dangerous fall. In fact, dedicated research on long-term care facilities shows that backward falls account for the majority of accidents during transfers to and from a rollator. The cause is almost always uncontrolled rolling. This is why developing the “parking brake habit”—engaging the brakes *every single time* before you turn to sit—is non-negotiable.
To transfer safely, you must follow a strict sequence of actions. This is not a casual movement; it is a deliberate procedure designed to keep you stable and secure at all times. The following steps should be practiced until they become automatic:
- First and foremost, push down or pull up on the brake levers until they click into the locked position. You should feel that the wheels are completely immobile.
- Turn around and position yourself with your back facing the seat. Do not attempt to sit from the side.
- Slowly back up until the backs of your legs make firm contact with the edge of the seat. This gives you a tactile cue of your position.
- Reach back and place your hands on the handles or the sides of the seat for balance and support.
- Gently lower yourself onto the seat. Never “plop” down, as the sudden force can still destabilize the rollator.
To stand up, reverse the process: scoot to the edge of the seat, plant your feet firmly on the ground beneath you, and use your leg muscles while pushing on the handles for support. Only release the brakes once you are fully upright and stable.
How to Go Up Curbs With a Rollator Without Hurting Your Lower Back?
Navigating a curb is one of the most challenging everyday obstacles for a rollator user. Approaching it incorrectly can lead to a loss of balance, a tipped rollator, or significant strain on your lower back. Many people’s first instinct is to try and pull the rollator up and over the curb using only their arm strength. This is both ineffective and dangerous, as it puts immense pressure on your shoulders and spine.
The correct technique leverages physics and your body’s strongest muscles: your legs. Most 4-wheel rollators come with a small pedal or “curb climber” on one of the rear wheels. This is not a brake; it’s a lever. By stepping on this pedal, you lift the front wheels, allowing you to place them securely on top of the curb. Once the front wheels are up, you can roll the device forward until the rear wheels meet the curb, then lift slightly and push forward to bring them up as well. This method requires practice but transforms a difficult task into a manageable one.
This close-up view demonstrates the proper body mechanics: the user is using their leg to press the curb climber, keeping their back straight and arms relaxed, to safely lift the front wheels.

A clinical study examining curb navigation techniques found that while 3-wheel rollators require tilting and lifting (demanding more user balance), 4-wheel models with curb climber pedals use leverage more effectively. Critically, the research emphasized using leg strength and weight shifting rather than arm pulling to prevent back strain. It also established a key safety guideline: users should avoid curbs higher than 4 inches and seek out ramps or alternative routes whenever possible.
Tray or Basket: Which Accessory Helps You Carry Lunch Without Spilling?
Accessories like trays and baskets seem like simple conveniences, but their placement can have a dramatic impact on a rollator’s stability. The fundamental principle at play is the center of gravity. Anything that raises the center of gravity makes the rollator more top-heavy and easier to tip over. Anything that lowers it or keeps it central will enhance stability.
A tray is typically mounted on top of the seat or handles. While convenient for carrying a plate or a book, it places all the weight high up. This is particularly dangerous on a 3-wheel rollator, which already has a smaller, less stable support base. Even a small amount of weight on a high tray can make a 3-wheeler dangerously unstable, especially during turns. An under-seat basket, common on 4-wheel models, is the far safer option. By storing items low and between the wheels, it actually lowers the overall center of gravity, making the device *more* stable, not less.
This distinction is so critical that it’s a core principle of rollator safety, as highlighted by mobility experts. As noted by the team at Harmony Home Medical Supply in their guide:
An under-seat basket on a 4-wheel rollator lowers the center of gravity, actually increasing stability, while a tray on a 3-wheel rollator raises it, making the device significantly less stable when loaded.
– Harmony Home Medical Supply, Types of Walkers Guide
The following table illustrates how these accessories affect the rollator’s performance and safety profile, especially when comparing 3-wheel and 4-wheel models.
| Feature | Tray (Top-Mounted) | Basket (Under-Seat) |
|---|---|---|
| Center of Gravity | Raises it (less stable) | Lowers it (more stable) |
| Best For | Flat surfaces (mail, books) | Groceries, laundry, bulk items |
| Maneuverability Impact | Requires more attention | Minimal impact |
| 3-Wheel Compatibility | Significantly reduces stability | Not available on most 3-wheelers |
| 4-Wheel Compatibility | Manageable with care | Ideal configuration |
The “2-Foot Rule”: Why Your Hallway Consoles Need to Go Right Now?
The perfect rollator can be rendered useless and even dangerous by an incompatible home environment. Before you even consider a specific model, you must become an expert on your own home’s dimensions. The “2-Foot Rule” is a simple guideline: you need at least 24 inches (2 feet) of clear, unobstructed width for safe passage with most walkers. However, rollators, especially 4-wheel models, often require much more space, particularly for turning.
That beautiful console table in the hallway or the decorative planter by the doorway might seem harmless, but they become hazardous obstacles when you’re navigating with a rollator. They narrow the path and can force you into an awkward, off-balance reach or a series of complex maneuvers to get by. A home safety study found that these exact kinds of “reaching behaviors” caused a significant percentage of walker-related falls. Removing non-essential furniture from your main pathways is one of the most effective fall-prevention measures you can take.
The numbers don’t lie. According to mobility experts, the necessary space for maneuvering is substantial. An analysis shows that 3-wheel rollators need a turning radius of about 35 inches, while sturdier 4-wheel models can require up to 50 inches. This means a standard 36-inch hallway might not be wide enough for a 4-wheel rollator to make a 90-degree turn into a bedroom without a difficult multi-point turn. Before choosing a rollator, you must measure not only your doorways but also your turning areas.
Community Center vs. Specialized Studio: Where to Find Instructors Trained for Seniors?
A rollator is a sophisticated tool, and using it correctly for maximum benefit and safety isn’t always intuitive. Learning proper gait, posture, and maneuvering techniques from a qualified professional can make a world of difference. However, not all instructors are created equal. A general fitness instructor at a community center may have good intentions, but they often lack the specialized training needed to work with seniors who have specific mobility and balance challenges.
When seeking guidance, you should look for professionals with certifications specifically in senior fitness and fall prevention. These instructors have a deeper understanding of the biomechanics of aging, balance disorders, and how to integrate mobility aids like rollators into exercise programs safely. They can teach you how to walk *with* the rollator—letting it guide and correct your posture—rather than just pushing it in front of you. This training helps you build confidence and ensures the device is an asset, not a crutch.
Specialized physical therapy clinics, senior-focused fitness studios, or instructors with specific credentials are your best bet. When vetting a potential instructor or program, don’t be afraid to ask about their qualifications directly. A truly qualified professional will be happy to share their credentials.
Your Checklist for Vetting a Senior Mobility Instructor
- Ask if they hold a Fall Prevention Specialist certification.
- Check for credentials as a Functional Aging Specialist or similar certification.
- Verify if they have training in recognized programs like the Otago Exercise Programme.
- Confirm experience with balance-focused practices, such as Tai Chi for Arthritis certification.
- Inquire about their experience with protocols from Gait and Balance Clinics.
Finding the right guidance is an investment in your long-term safety and mobility. The right instructor will empower you to use your rollator to its fullest potential, keeping you active and secure.
Key Takeaways
- A 4-wheel rollator’s wide support base is inherently safer for significant balance issues than a 3-wheel model’s triangular base.
- The safest rollator is one that fits your environment; measure doorways and turning areas before buying an “all-terrain” model.
- Proper use is as important as the device itself. Always engage the parking brake before sitting and learn the correct technique for navigating curbs.
Why Your Shoulders Hurt After Using a Standard Cane for Only 20 Minutes?
For many, the journey to using a rollator begins with a cane. A cane is a great tool for minor support or to alleviate pressure on one leg. However, if you have a more significant balance impairment or require substantial weight-bearing support, a cane can quickly become part of the problem. If you notice shoulder, back, or wrist pain after using your cane for even a short period, it’s a clear biomechanical signal that your body is not being supported correctly.
The reason is simple: a cane creates asymmetrical loading. All of your weight is directed through one arm and one side of your body. According to physical therapy research, this uneven distribution of force can lead to shoulder pain, poor posture, and spinal misalignment in as little as 20 minutes of use. Your body contorts to lean on the cane, rather than the cane helping your body stay upright and balanced.
This is the critical tipping point where a rollator becomes the safer, healthier choice. Unlike a cane, a rollator provides symmetrical, bilateral support. By holding the handles with both hands, you distribute your weight evenly and walk within a stable frame. This not only provides a much larger base of support to prevent falls but also actively corrects your posture, encouraging you to stand taller and walk with a more natural gait. This biomechanical advantage is the primary reason why transitioning from a cane to a rollator is a crucial step for long-term safety and comfort when balance becomes a primary concern.
Making the right choice between a 3-wheel and 4-wheel rollator is a deeply personal decision that balances stability, maneuverability, and your living environment. To ensure you select the safest and most effective device for your unique needs, consider seeking a professional assessment from a physical therapist or an assistive technology professional.